How to schedule content from the calendar
Use the calendar to schedule content across your connected social networks. This article explains the standard post flow, key options, and the main differences to watch for on each platform.
Available social networks
You can schedule content on Facebook, Instagram, X, LinkedIn, Pinterest, TikTok, YouTube, and Google Business from the calendar.
The post creation flow is mostly the same across networks, but Instagram and TikTok need extra attention. See:
Ways to schedule
Individually: create posts manually in the calendar.
From CSV: bulk schedule content by importing a CSV file.
Individual scheduling
You can change the time zone from the dropdown next to the current time.

Go to Planning.
Click Create new post, or click a time slot in the calendar, then select the networks where you want to publish.
Use the text box to add copy, links, and mentions. If needed, see How to schedule threads.
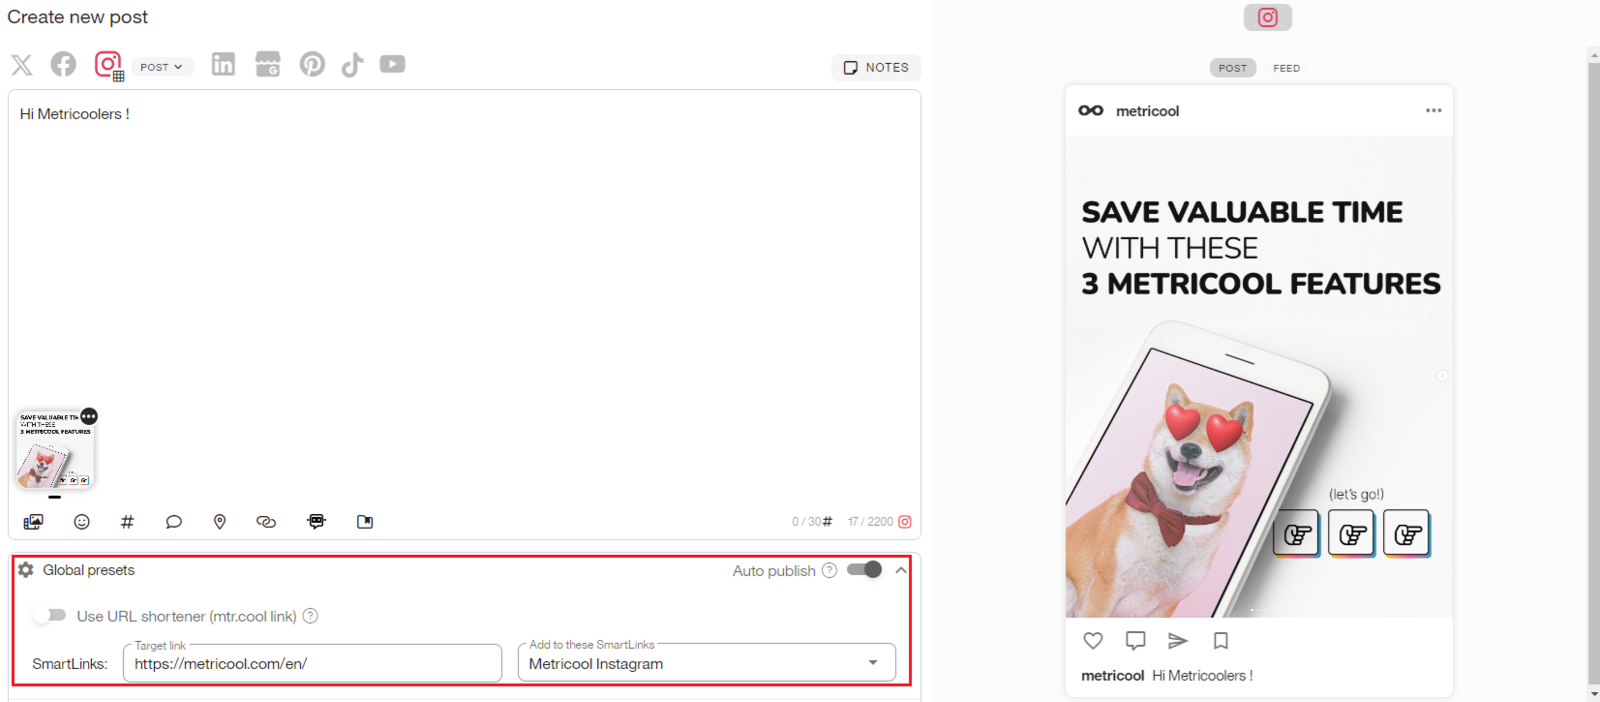
Add multimedia content such as images, videos, or GIFs, based on each network’s requirements. Use the attachment menu to view the available options. You can also edit images and videos while planning.

Additional options
Global settings
URL Shortener: turn this on if you want to hide the original URL. The URL is shortened when the content is published. If the post contains more than one link, all links are shortened. The shortener does not track clicks.
SmartLinks: when the post is published, it is automatically added to the selected SmartLink.
Network-specific settings
Under the global settings, you can configure additional options depending on the selected networks. For related examples, see:
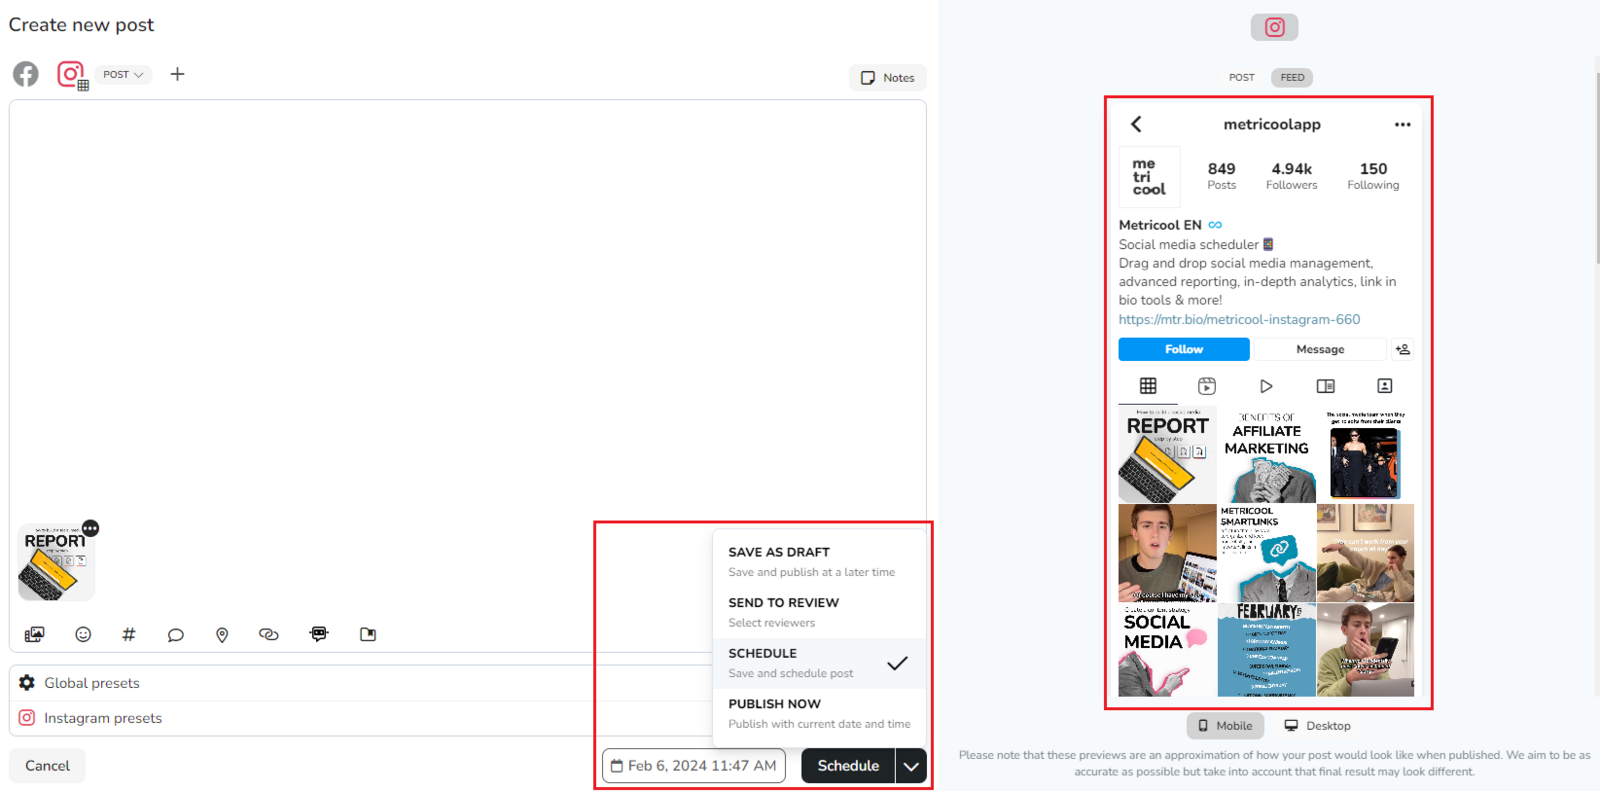
Select the date and time, then finish with one of these options:
Schedule: save and publish at the selected time.
Save draft: keep the post for later.
Save to the library: store the post in the content library.
Send to review: add reviewers for content approval.
Publish now: publish immediately with the current date and time.
Before you finish, use the preview to check how the post will appear on desktop and mobile. For Instagram posts, you can also preview the feed layout.
Once the post is saved, you can duplicate it to create a copy in the current brand. To delete a post, click the trash icon.

Other planning resources
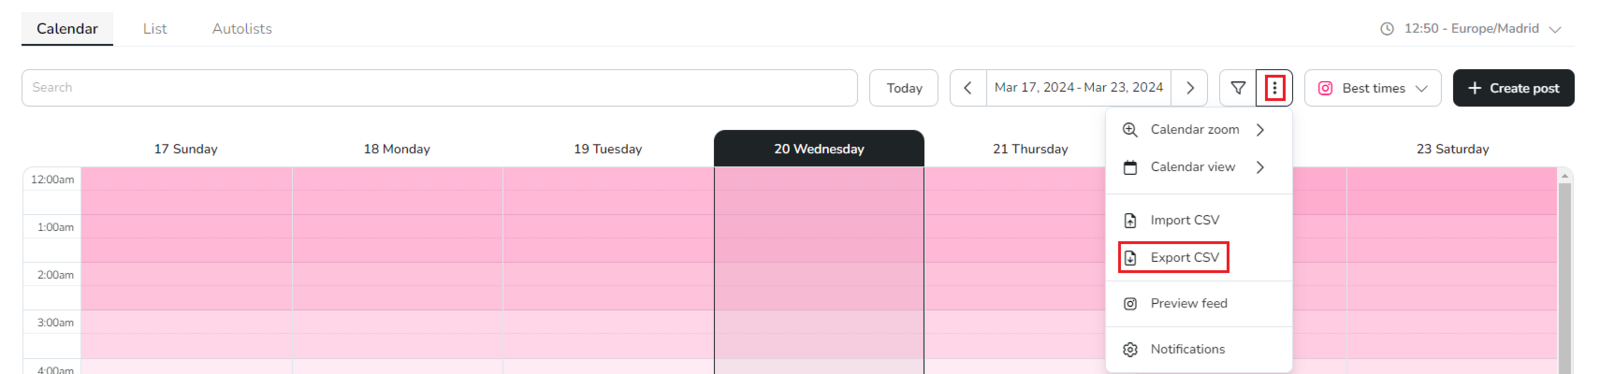
Download the publication calendar
Use the export option to download the calendar with your scheduled posts for reporting or content plan review.
If you need to publish recurring content or use an RSS feed to share blog updates automatically, see Autolists.