How to connect my website and blog
Connect your website or blog to start tracking visits and viewing analytics in the platform.
How it works
You need to install the tracking code to collect data from your website or blog. Data is collected from that moment forward. Previous data cannot be recovered.
This JavaScript code runs in the browser and makes an asynchronous call to the tracking service that records the visit. The country and viewed page are detected through the IP address.
The tracker does not use cookies.
Once the website is connected, you can view visits in real time right away. Website analytics become available after 24 hours.
The website name may not display correctly at first, but it updates within 24 hours.
Considerations
Canva websites do not support the tracking code.
The tracking pixel option does not collect all blog metrics.
Connect a website
To connect your website:
Click the top-right menu and select Connections.
Click Connect website.
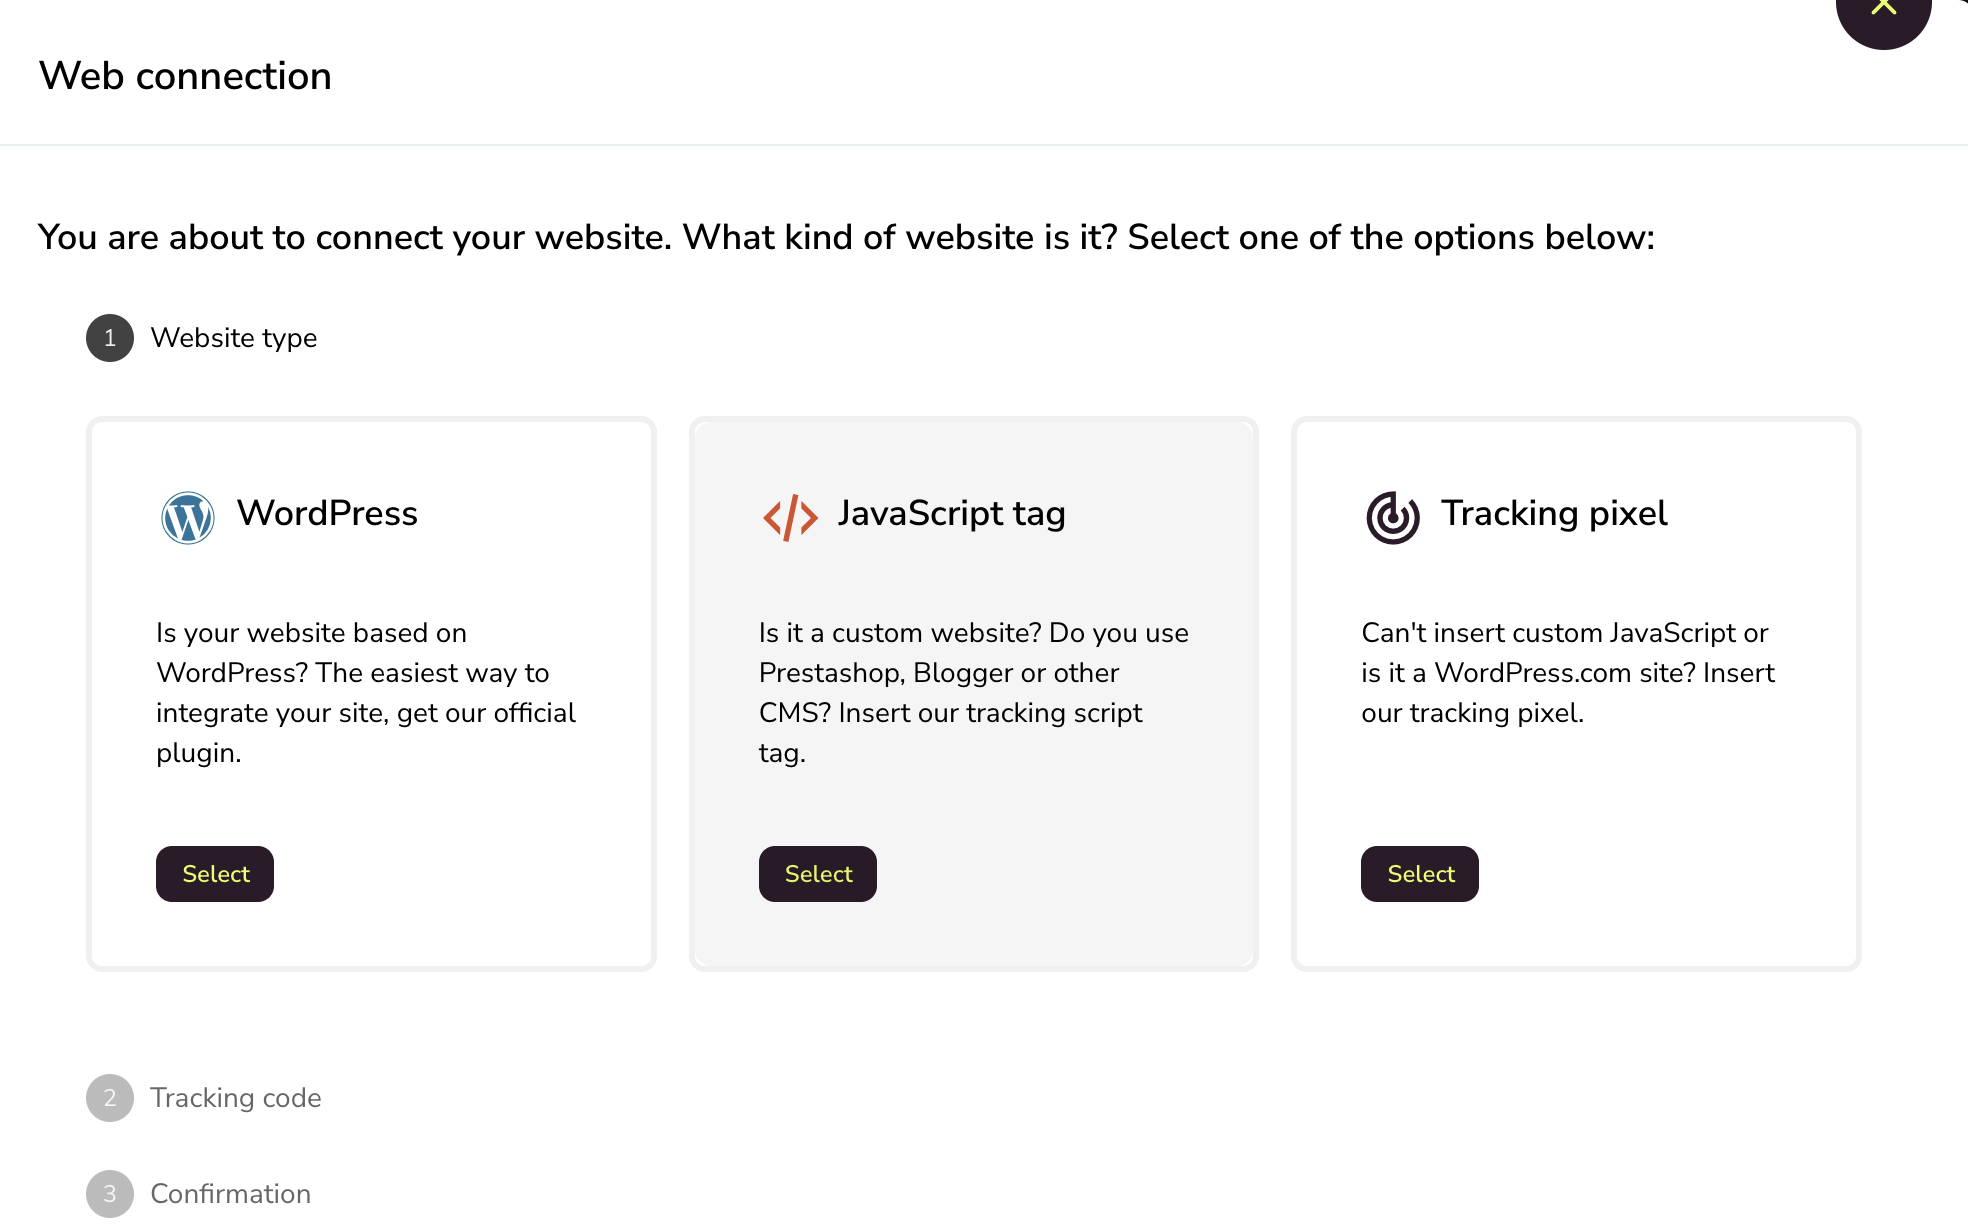
Choose the type of connection you want to use: WordPress, JavaScript tracking tag, or Tracking pixel.
Copy the tracking code generated.
Add it to your website by following the instructions for the option you selected.
Go back and click Verify connection.
To complete verification, visit your website so the installation can be detected.
Once verification is complete, your website will be connected and you will be able to view visits in real time.
Important: analytics data will be available starting the day after the connection. Until then, your domain may not appear updated yet.
If you completed the connection and no data appears after 24 hours, check the troubleshooting article for website or blog connections
Option 1: WordPress
Option 2: JavaScript tracking code
Use this option for Blogger, Prestashop, Wix, and similar platforms. This tutorial explains how to add it.
Option 3: Tracking pixel without JavaScript
In this case, the platform cannot collect some blog metrics.
Once verification is complete, the website is connected and you can view real-time visits.
In the analytics section, data appears starting the day after the connection. The domain may also take up to 24 hours to update.
Edit domain name
After the connection is complete, you can edit the displayed website name by clicking the pencil icon. This only changes the label shown in the interface. It does not change the website linked to the installed tracker. If you need to switch websites, see Change the connected website.

Blog connection
When you connect the website, if the blog has an RSS feed configured, the platform detects it automatically. A new box appears with the blog connection and the feed URL.
Blog post history depends on the RSS feed configuration. For example, if the feed is limited to 50 posts, only those 50 posts can be shown. The reader only displays the information returned by the feed.
If it does not connect automatically, or the feed was not configured at that time, you can connect it manually from the connections panel.

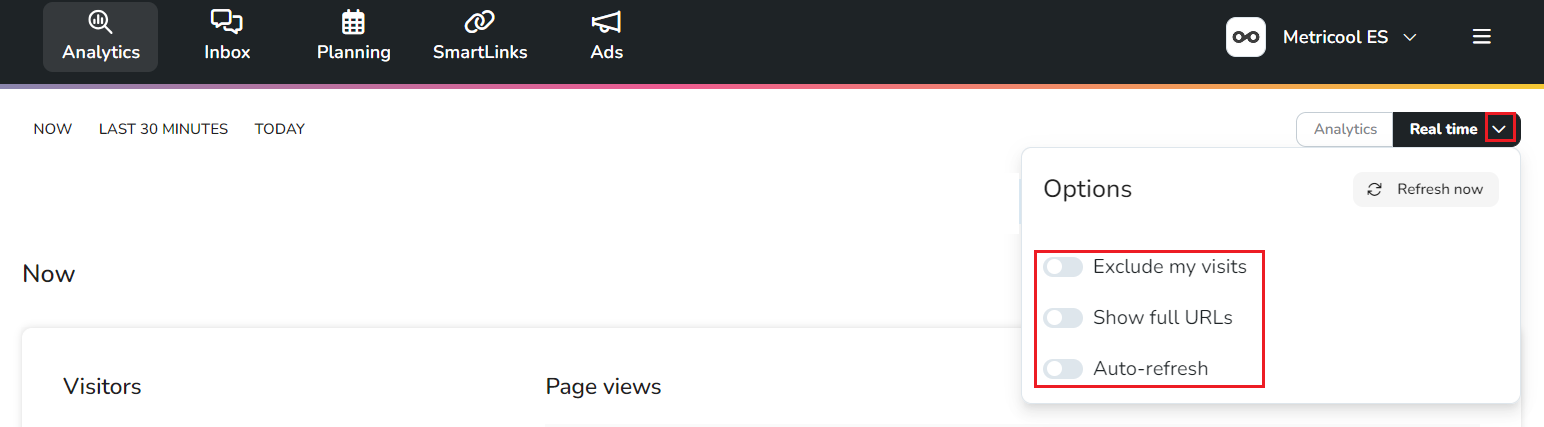
Exclude your own visits
You can exclude your own visits from Real-Time > Exclude visits.
If there are multiple IP addresses, exclude each one separately.
In the same menu, you can also show complete URLs and enable auto-refresh.
Disconnect a website
To disconnect a website, remove the tracking code from that website. The disconnection can take a few days if visits still appear because the code is cached in a browser.
Change the connected website
If you want to monitor another site, you can reuse the same code on the new site, but first remove it from the website you no longer want to track.
The data history for the disconnected website is not deleted. It is also normal to keep receiving some data from the old website for a couple of days.
When you move the tracking code to another website, real-time visits appear immediately. Analytics for the new website become available after 24 hours. The domain also updates after 24 hours.
No data available
If no data appears, see I have connected the web / blog but no data appears.